 MkSaaS Docs
Smart Remote Control
User manual for the Smart Remote Control with Temperature & Humidity Sensor (T3-Smart-301), a Wi-Fi infrared controller for your home appliances.
Thanks for choosing our product! Say goodbye to using a separate remote control for each of your IR home appliances such as TV, air conditioner, TV box, light, fan, audio, etc. You can remotely control these devices with the tap of a finger in the mobile app, and you can also monitor the temperature and humidity in the app anytime and anywhere.
Please read this user manual carefully before use and keep it for future reference.
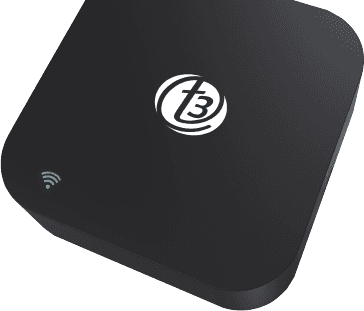
Product presentation
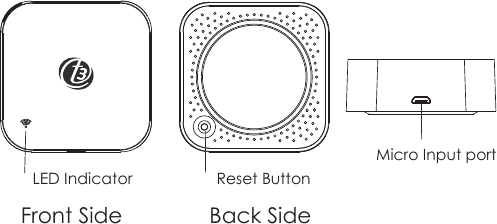
- Front side: LED indicator
- Back side: Reset button
- Side: Micro input port
Please place it like the front side shown above when in use.
Product specification
| Item | Specification |
|---|---|
| Size | 60 × 60 × 20 mm |
| Micro input | DC 5V/1A |
| LED indicator | Blue |
| Infrared frequency | 38 KHz |
| Infrared range | ≤ 10 meters |
| Wi-Fi protocol | 2.4 GHz |
| Wi-Fi standard | IEEE 802.11 b/g/n |
| Temperature measure range | 0 ℃ ~ 80 ℃ |
| Temperature accuracy | ± 1 ℃ |
| Humidity measure range | 0% RH ~ 99% RH |
| Humidity accuracy | ± 5% RH |
Checklist before using the device
Before you set up
- Your smartphone is connected to a 2.4 GHz Wi-Fi network.
- You have entered the correct Wi-Fi password.
- Your smartphone is Android 4.4+ or iOS 8.0+.
- Your Wi-Fi router is MAC-open.
- If the number of devices connected to the Wi-Fi router has reached the limit, try to disable a device to free up a channel, or try another Wi-Fi router.
How to set up
Download the T3 Smart App
Use your smartphone to scan the QR code, or search T3 Smart in Google Play Store or the App Store to download and install it.
Create an account
Create an account with your mobile number and authentication code.
Add the device
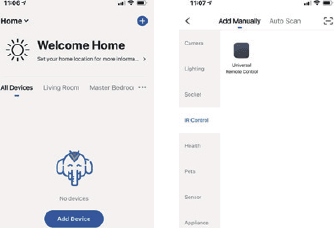
Connect your phone to your Wi-Fi router, tap + in the upper-right corner of the homepage or tap Add Device, then select Universal Remote Control from Other.
Supply power
Supply power to the IR remote control with the supplied Micro cable, then connect it to Wi-Fi as described below.
Connecting to Wi-Fi
-
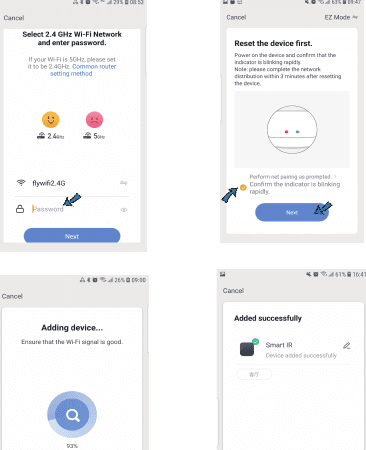
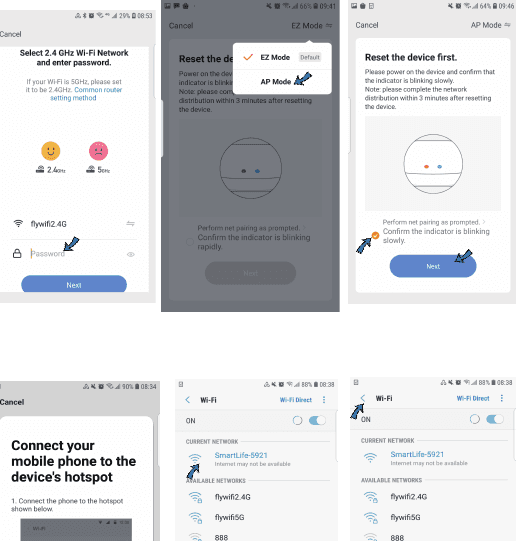
If your Wi-Fi router only opens 2.4 GHz, enter the Wi-Fi password. If the LED indicator is not blinking rapidly, hold the reset button for about 5 seconds until the indicator blinks quickly — it will connect to the Wi-Fi network automatically. After the configuration is done, add the IR devices you want to control.
-
If your Wi-Fi router opens both 2.4 GHz and 5 GHz with the same name, enter the Wi-Fi password and select AP Mode. Hold the reset button for about 5 seconds until the LED indicator blinks slowly, connect your phone to the device's hotspot SmartLife-XXXX, then return to the app interface — it will connect to the Wi-Fi router automatically and the configuration is complete.
Match a remote and control devices
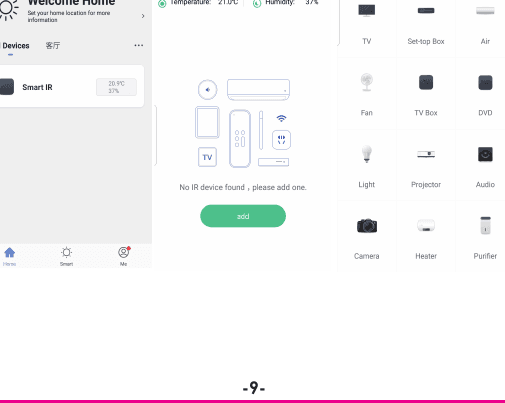
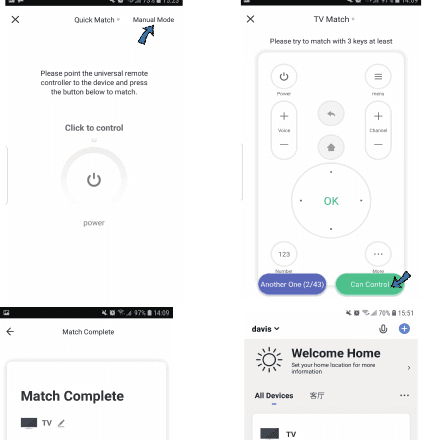
Tap Smart IR, then tap Add, and select the device and its brand that you want to control. Tap Quick Match or Manual Mode to match the buttons. Match at least 3 buttons to check whether the device reacts properly; if it does, matching is complete and you can control the device. If you add the same device type with the same brand in one room, please give the devices different names to avoid control confusion.
If a remote control for an electric device cannot be found in the existing brand library, you can copy the buttons and use them to control the devices. It supports TV, TV box, set-top box, fan, etc.
Copy buttons
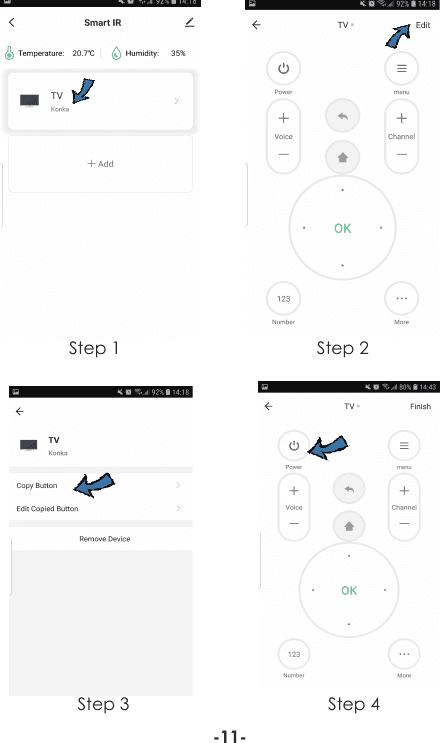
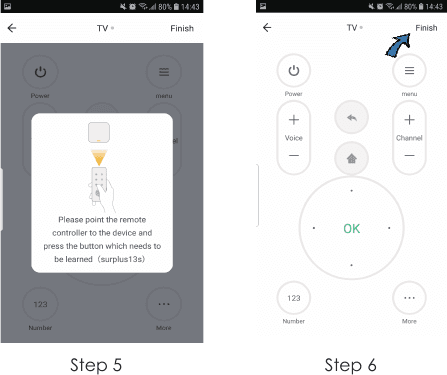
After a button is copied successfully, press it to check whether it works properly. You can tap Finish or continue to copy other buttons.
Learn buttons with DIY
If you cannot find the brand of the device in the brand list, you can choose DIY to learn the buttons of other brands' remote controls, so you can still control the device. Tap + to continue copying other buttons, or tap Finish.
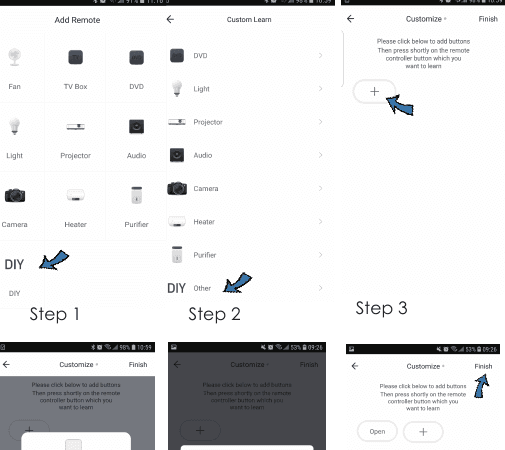
Notes
- It only supports the 38 KHz frequency. If the IR remote is unable to receive commands from the IR device, the frequency of the IR device likely does not match and the commands cannot be learned.
- DIY does not support voice control.
Functions
1. Customize scenario
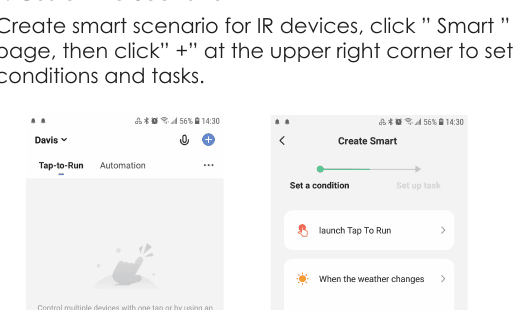
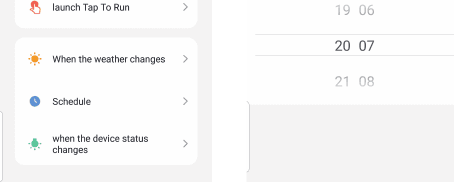
Create a smart scenario for IR devices: tap the Smart page, then tap + in the upper-right corner to set conditions and tasks.
2. Remote control & voice control
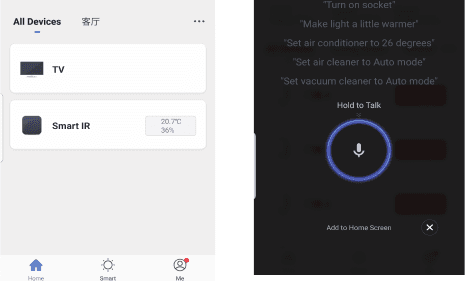
With all-in-one integration, you can control added IR devices remotely wherever you are, anytime, in the mobile app. You can also tap the microphone icon in the upper-right corner and hold to speak your control commands for specific devices.
3. Set schedule
Select Tap to Run or Automation on the Smart page, tap + and select Schedule to set power on/off for specific devices.
4. Share devices
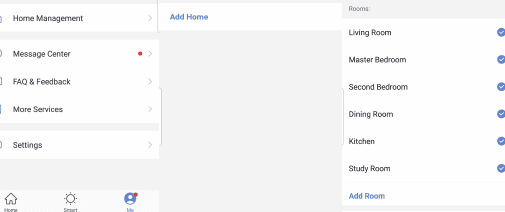
You can share your added devices with your family members, so they can also control the devices.
5. Monitor temperature & humidity
You can monitor the temperature and humidity in real time in the app, and take action to make adjustments if necessary.
6. Third-party voice control
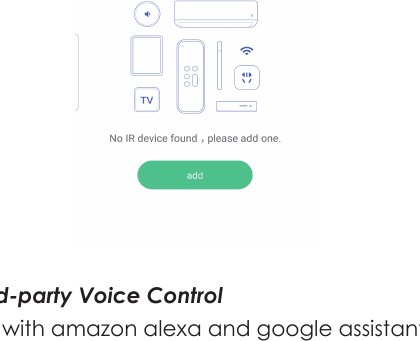
Works with Amazon Alexa and Google Assistant.